
On YouTube, TikTok, and Instagram (among others), cooking videos are among the most frequent kinds of content. Ranging from fast-moving recipe snapshots and tutorials, TV watchers adore quality food material. The creators must not only have good filming, but also smooth editing, which makes the audience continue watching. To bring your cooking video to life, CapCut Desktop is the right video editing software that will accomplish your goal.
We will provide step-by-step descriptions of how to edit cooking videos in Capcut Desktop, compare its gorgeous tools, and find out the advantages of using it for cooking materials.
Why CapCut is Perfect for Cooking Videos
Food content needs an element of precision and creativity. CapCut is unique as it was created to integrate the expertise of professional editing and deception easily with easy-to-understand tools. That is the reason it is applicable in cooking videos:
-
Clean visuals – Crunch food pictures in color filters and color grading.
-
Text overlays – Add step-by-step recipe instructions to the screen.
-
Voice changer – Diversify narration through experimenting with voice effects that are fun.
-
Seamless audio sync – Movie or voiceovers can be aligned flawlessly.
-
HD export options – Publish sharp, professional-formatted video to be posted on YouTube, Instagram, or TikTok.
Benefits of Using CapCut for Cooking Videos
CapCut Desktop is not just convenient; it is designed to make it easy to create culinary content, making it their most faithful companion:
-
Beginner-friendly tools – The straightforward drag-and-drop features and easy timeline format feel quite approachable to beginner editors, who can design impressive recipe videos with ease and without any misunderstandings.
-
Customization for branding – Because playing with fonts adds a new touch or aligns with the established branding, CapCut offers the option to add custom fonts, branded stickers, overlays, and a variety of clean transitions to meet your visual branding requirements.
-
Engaging audio options – Select background music that matches your recipes: pop, rap, soothing acoustic, or simply record your own. The voice changer can even be used to add some dying effects to quick recipe reels or emphasize fun commentary.
-
Professional results – high-resolution exports, meaning that your food will be mouth-watering no matter what platform you put it on, be it YouTube or Instagram. Sharp images and fluid frame rate make your videos look tack sharp.
-
Time-saving workflow – You can use everything in a single place – cuts, sound, text, effects, all, in CapCut. It will help lessen production time, and you will have more focus on new recipes.
-
Creative freedom – Add photos, step-by-step text overlay, close-ups, and movie filters to make your tutorials on cooking visually attractive and easy to follow.
-
Wide platform compatibility – Export the video in various aspect ratios, be it in TikTok, Instagram Reels, or YouTube, and have your recipes everywhere.
Step-by-Step Guide to Editing Cooking Videos in CapCut
Here’s how to take raw kitchen footage and transform it into a polished cooking video:
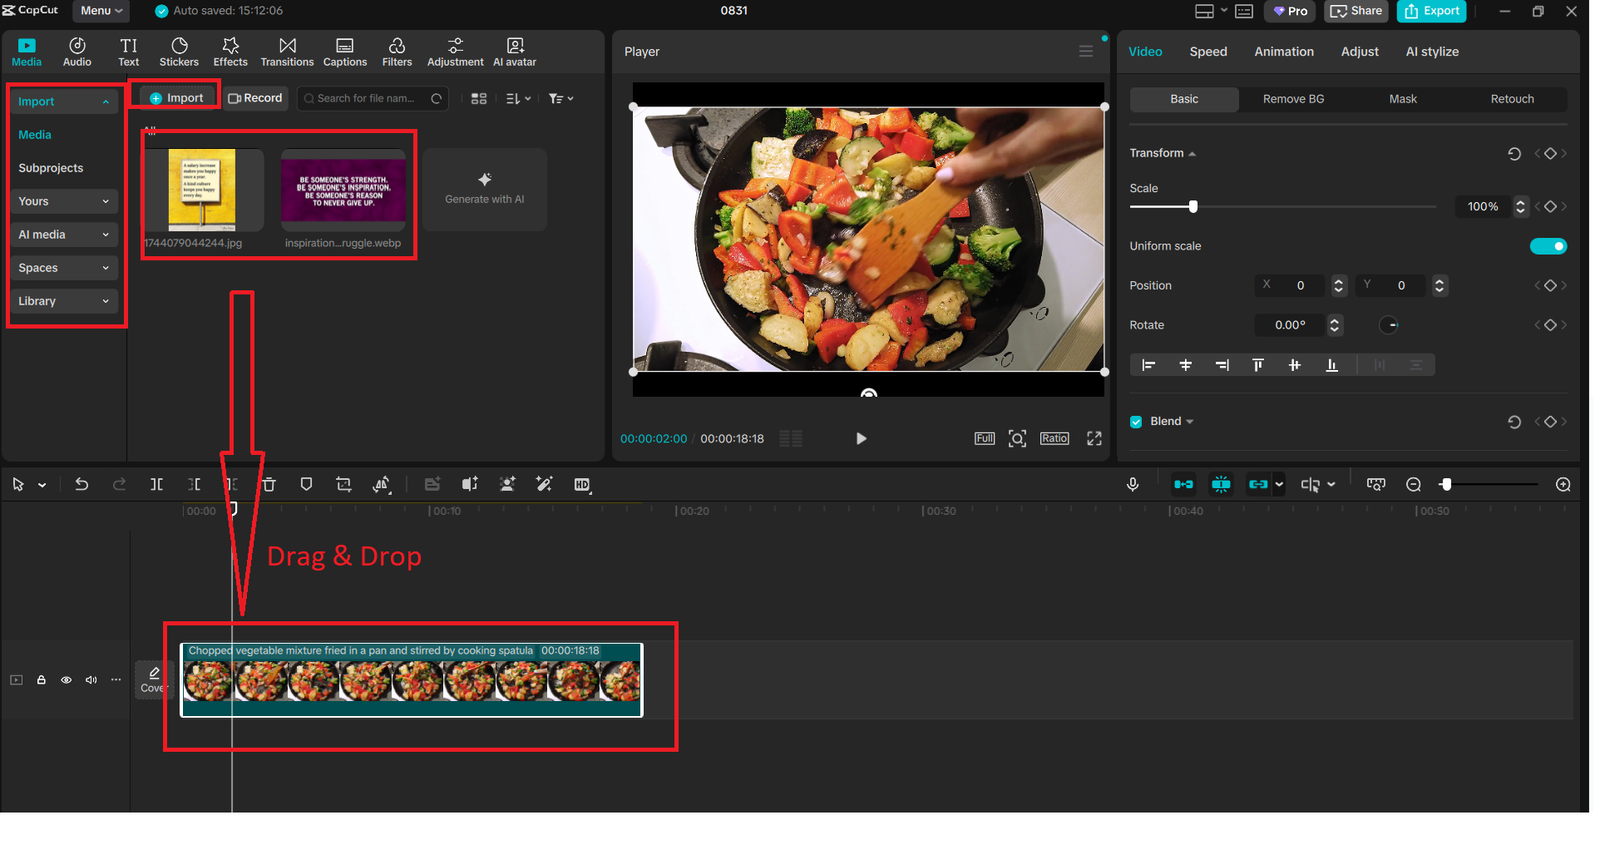
Step 1: Import Your Footage into CapCut Desktop
Start the CapCut Desktop and create a new project. Click on the Import button to include your raw cooking clips, recipe shots, or intro shots. Arrange them in the order of your recipe, so that one step in a sequence will logically lead you to the next.
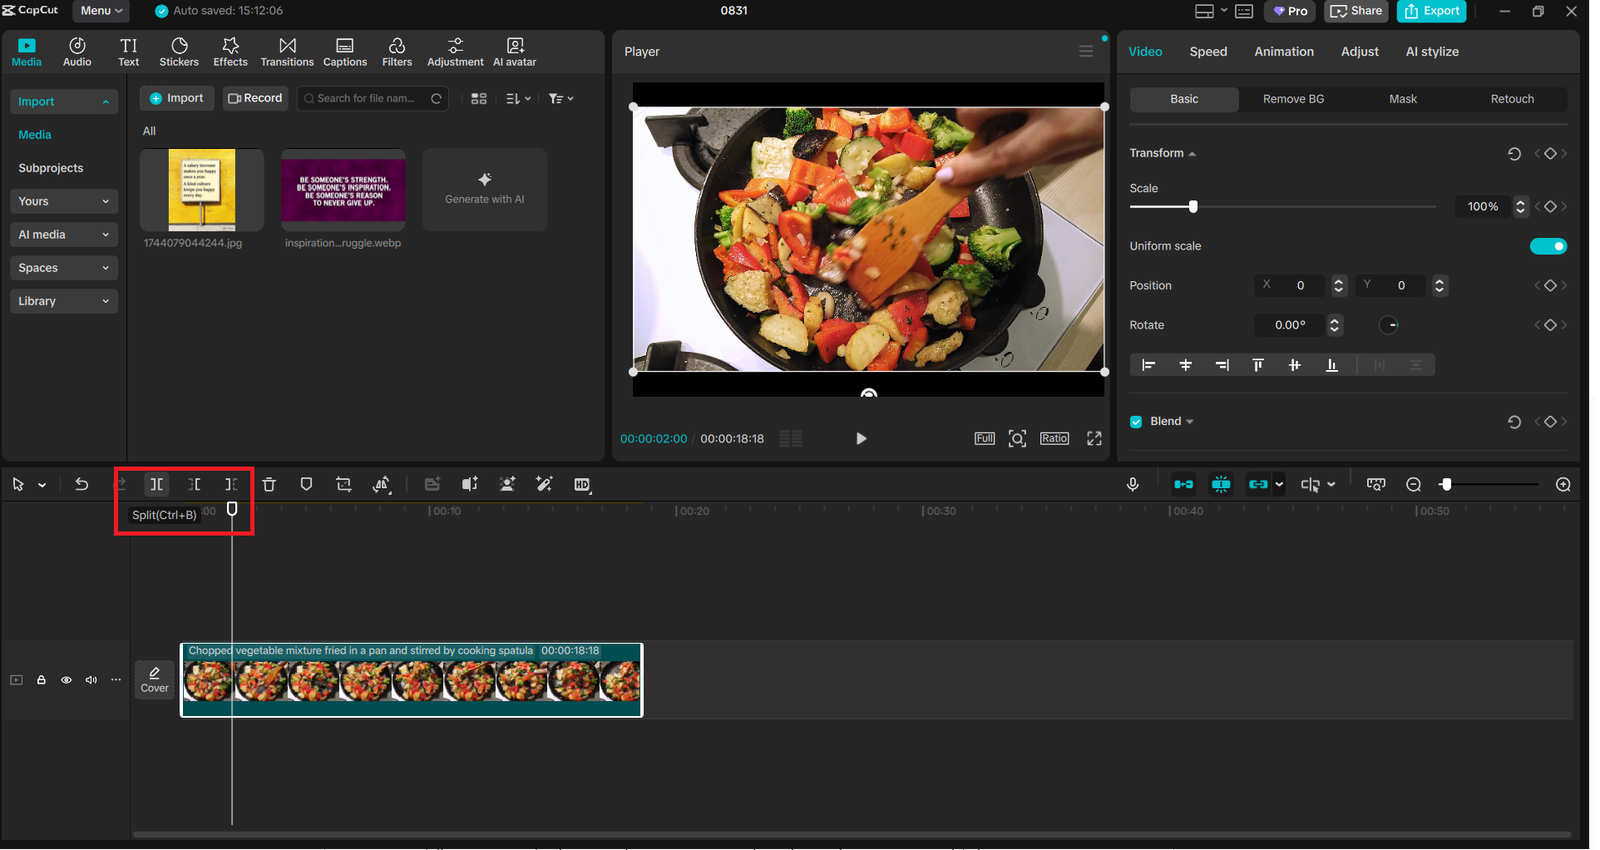
Step 2: Trim and Arrange Cooking Clips
Work with trimming and splitting tools to cut out any mistakes, pauses, or other redundant films. Sequence your clips to make your viewers only watch the necessary steps-to prepare food and serve it. This serves to keep the clarity and ensure your video is engaging.
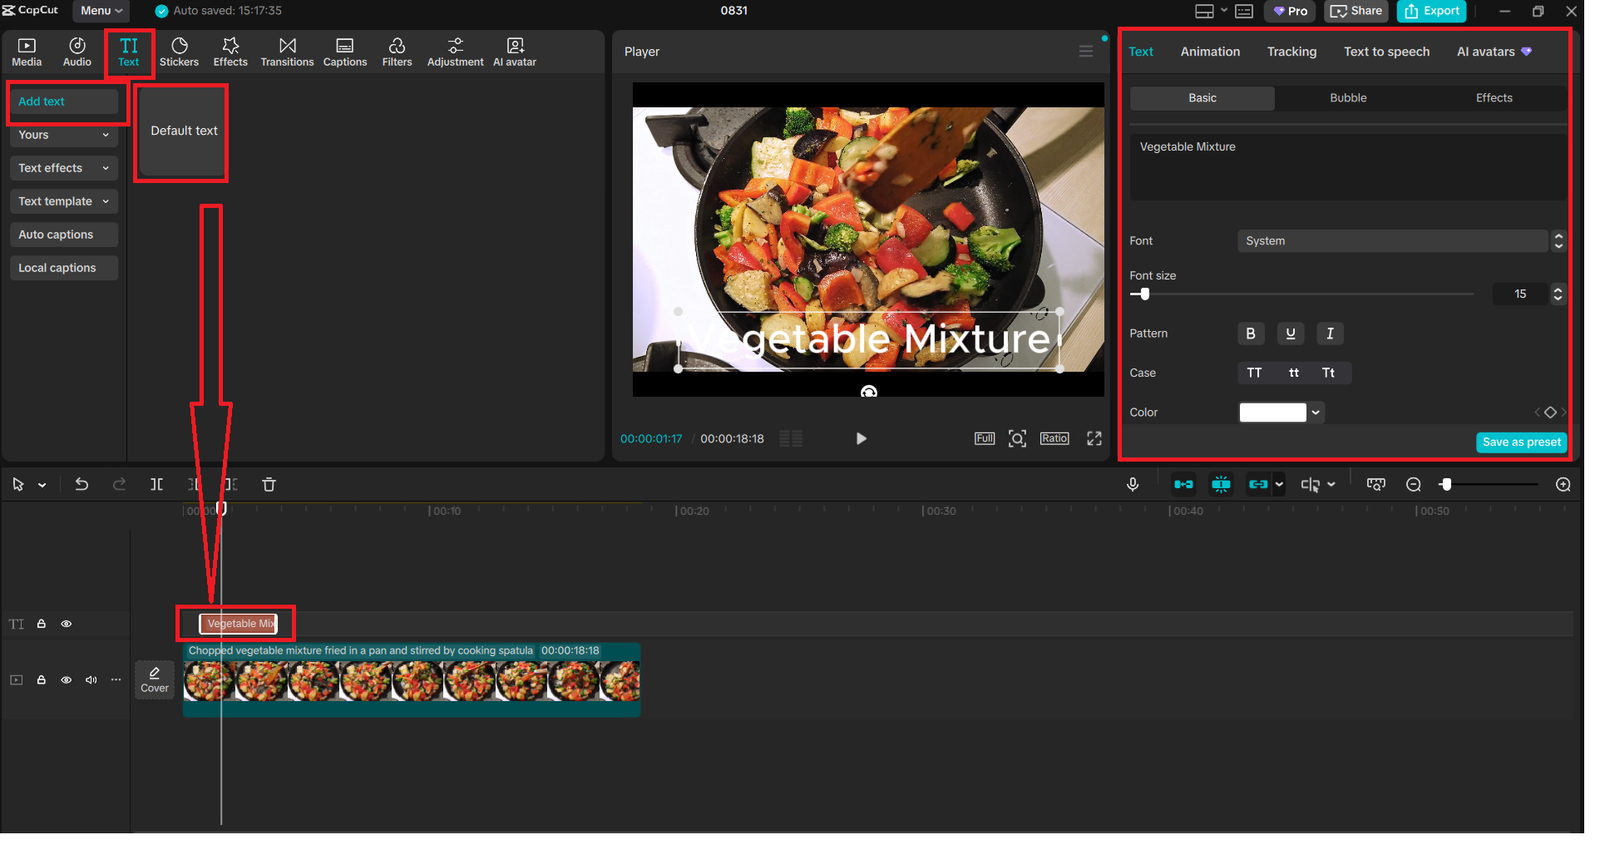
Step 3: Add Text and Subtitles
It is simple to add text overlay with CapCut for steps or ingredients of recipes. Insert flashy fonts and in-screen descriptions to direct your viewers through the procedure. Subtitles will also ensure your cooking videos are engaging to a wider audience, more so to international viewers.
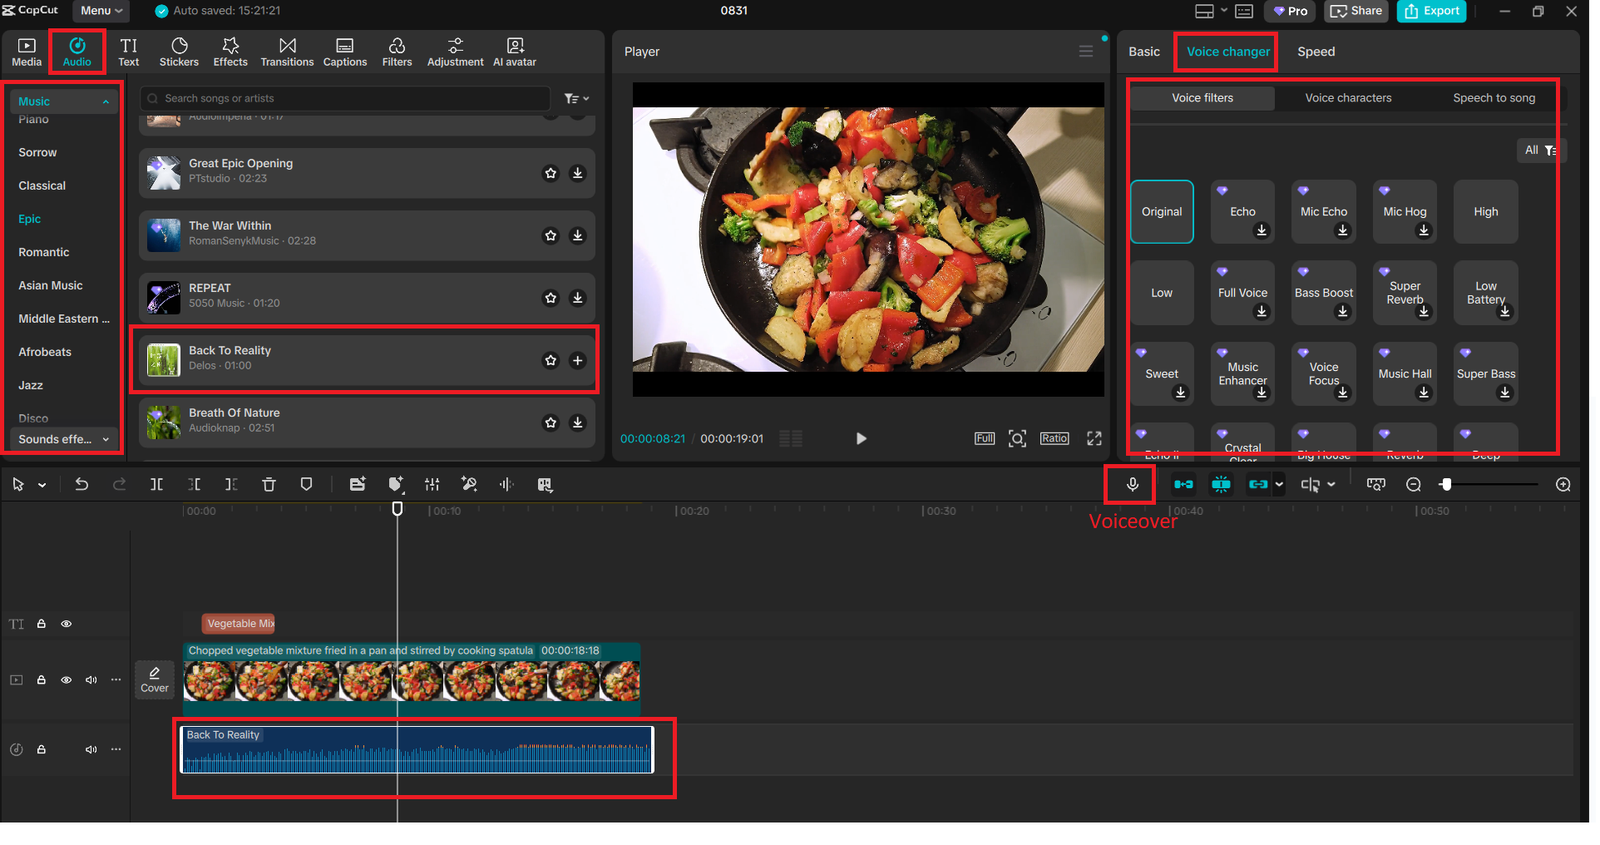
Step 4: Enhance with Music and Voiceover
Background music will give the feeling of your cooking video. Select soothing, slow, or movie-theatrical music by the mood of the dish you are eating. The voice changer of CapCut can also be used to add funny talks or remain natural, using a clean voiceover recording when explaining recipes in detail.
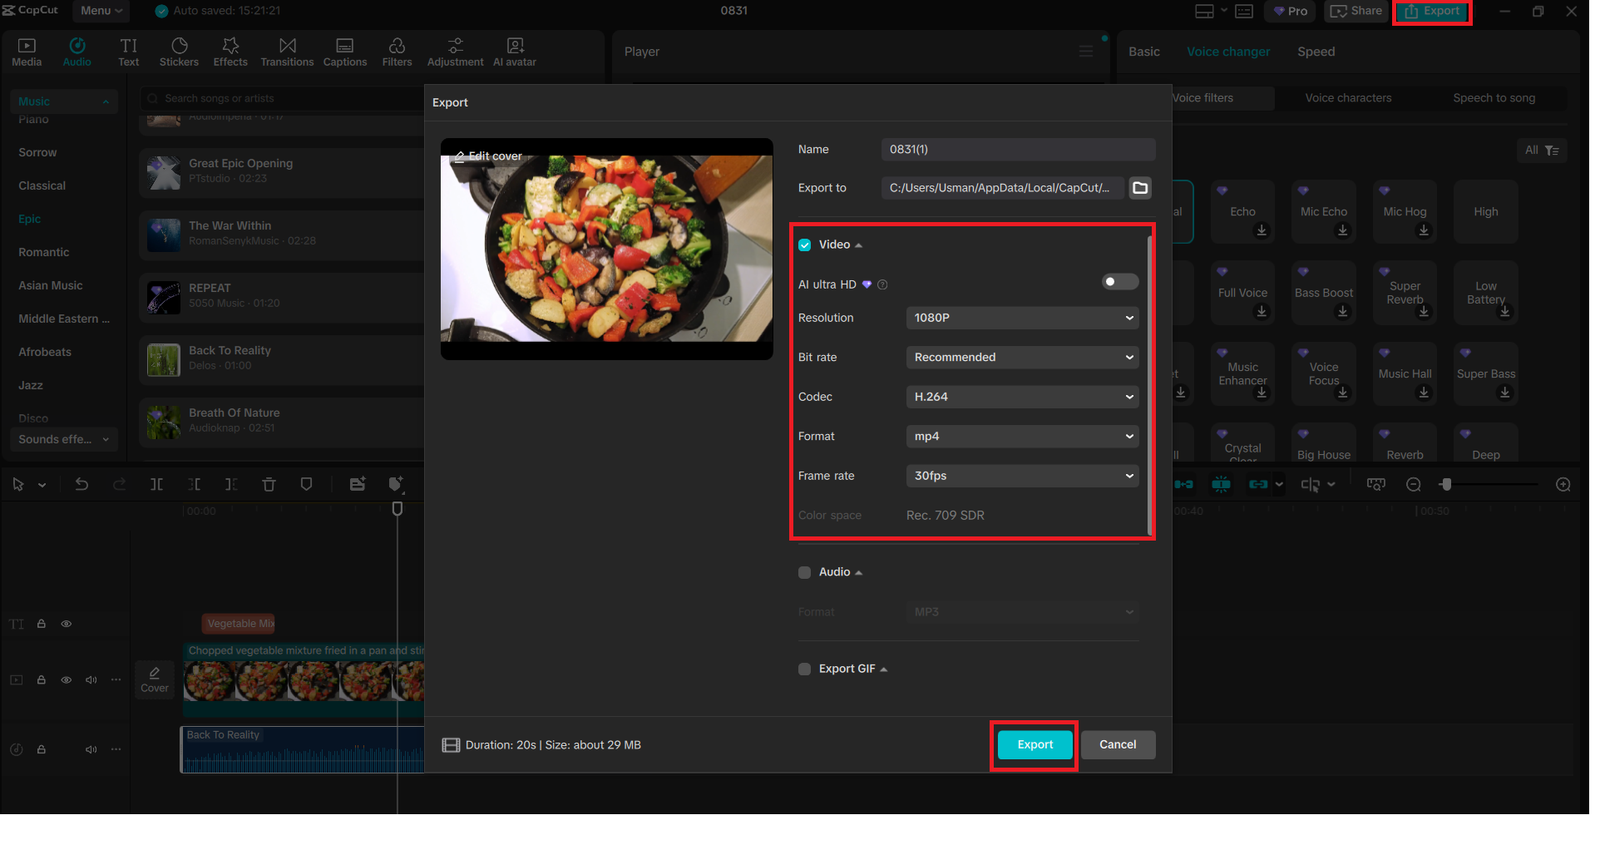
Step 5: Apply Filters and Export to High Quality
CapCut is loaded with filters and color correction tools, allowing you to make your dishes look tastier on a monitor. Adjust brightness, contrast, and saturation for vibrant visuals. After sufficing, you can export your video to HD or 4K to see your results in professional quality.
Additional Creative Ideas for Cooking Videos
Enliven your cooking content; you can use CapCut Desktop in the following creative ways:
Before-and-after effects – Put matrices of raw ingredients that change to the finished dish with transition effects.
Recipe highlight reels – Quickly summarize recipes on TikTok / Instagram Reels.
Photo integration – Pair CapCut with an online photo editor to improve the food photos and upsell them alongside your cooking videos to tell the whole story.
Cooking series intros – Have customized and branded intros created for your cooking news to give your videos a professional look at your videos.
Final Thoughts
There is no need to be complex about editing your cooking videos. CapCut Desktop enables you to edit, organize, and improve your video effortlessly. Whether it is to add subtitles so your FP does not look like a textbook draft, or some filters that keep your dishes on point, CapCut will make your content look enhanced and professional. Novice or professional food content producer, this video editing software can be used to make your cooking videos appear substantial and entertaining puberty video tutorials.